Studio Nibble
/
Discographica
Scanning Record Sleeves and Merging Them In Photoshop
Yes, it is possible to scan 12" record sleeves without having
to buy an A3-sized scanner, but unless you like spending all your time
gluing together pieces of a jigsaw puzzle you still need something
larger than a normal 8.5"x11" flatbed. A legal-sized scanner is
8.5"x14" and does a great job. You have to scan each sleeve in two
halves, but with a little practice you can get the time spent merging
them together down to just a few minutes.
Before You Start: Your Tools
Most important of all is the image editing software. This tutorial
assumes you have Photoshop, but other applications like The Gimp might
work for you as well. You'll need something that can put each scan on
its own layer in the same image.
Chances are that you're stuck with the software that came with your
scanner. The pack-in software with most scanners is pretty poor, and
doesn't give you the best control over the results. If you're willing
to spend some money for something better, VueScan is a great investment. The
professional version can be used with a color scanning target to
calibrate your scanner for the best color reproduction. It also talks
directly to a lot of scanners, letting you use older hardware without
having to go through TWAIN-driver hell.
My scanner is a Umax Astra 1200S (SCSI), which I'd given up for dead
once I switched to Windows XP -- there just didn't seem to be any way to
get it reliably talking to the computer, and even when it did, the Umax
software was worthless. Vuescan found it on the first try without
installing a single driver, and has worked without a hiccup ever since.
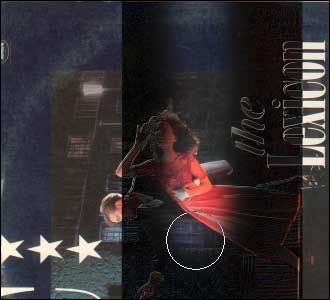
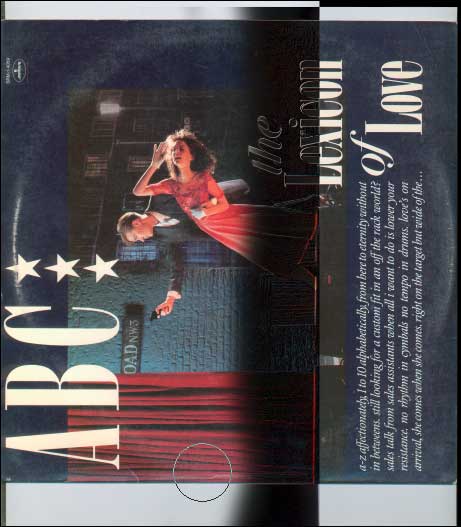
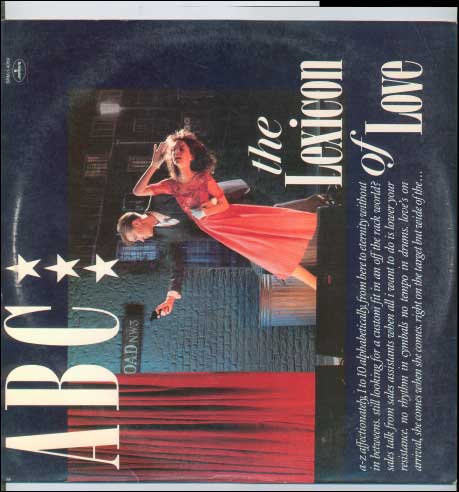
Here are a few examples of the quality you can squeeze out of this
eight-year-old clunker with the right software:
Not bad for being glued together, huh?
Scanning The Sleeve
Here are some guidelines to follow for the best results:
- Scan at 150 dpi, and don't set a final target size. Each
resulting scan will be around 1300x2100 pixels.
- Your scanner software probably has an automatic color adjustment
setting that tries to set the color levels of each scan based on the
darkest and lightest areas of the image. You should turn this option
off, or if you know how, use it only on the first scan then keep the
same settings for the second. If the software is allowed to adjust
the colors differently on each half of the sleeve, there will be an
obvious color difference between the two halves when you combine them.
Clean up the colors in your image editing software instead, after
you've merged the two halves of the sleeve.
- Cover as much of the scanbed as you can with the sleeve. The more
overlap you have between the two halves, the easier it'll be to merge
them.
- Get each half of the sleeve as straight on the scanbed as possible.
- Make sure the sleeve is oriented in the same direction on both
scans -- if the top of the sleeve is towards the left-hand edge of the
scanner for the first scan, make sure it's towards the left-hand edge
for the second as well.
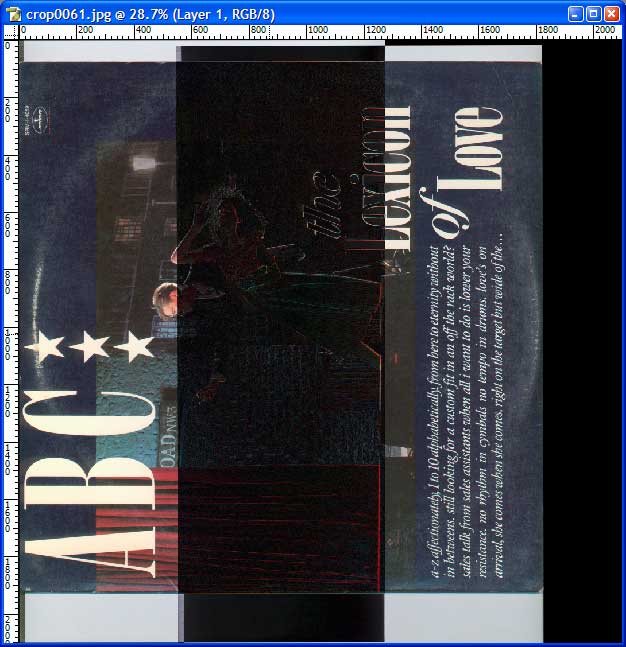
Merging The Scans
Open both scans in Photoshop.

Straightening The Scans
Unless you're extremely lucky (or highly skilled) the sleeve probably wasn't perfectly aligned with the edge of the scanbed when you made the scans, which means the two halves won't overlap each other exactly. You can correct for this by rotating each of the scans as follows:
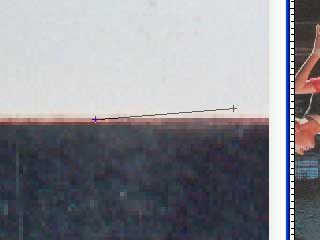
- Select the Measure tool by pressing Shift-I until the ruler is
selected in the toolbox.
- Find a horizontal or vertical line that stretches as far across
the sleeve as possible, preferably across both scans. The edge of the
sleeve will probably work fine.
- Zoom in on one end of the line to 400% or so, large enough to see
individual pixels.
- Drag the measure tool along the line as far as you
can.
- From the menu, select Image - Rotate Canvas - Arbitrary. This
will open the Rotate Canvas dialog. You'll see that the Angle: value
is already set for you -- this is based on the line you drew with the
Measure tool.
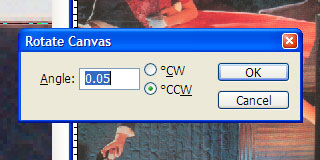
- Click OK. This will rotate the image so that the two ends of the
Measure tool line are on the same row or column of pixels. The scan
is now properly aligned.
- Repeat these steps for the second scan. The two scans should now
be aligned with each other.
It's easier to rotate the two halves while they're in separate files.
You can also rotate them using Edit - Transform - Rotate once they're on
their own layers in a single file, but the value returned by the Measure
tool needs to be reversed in the Angle box in the menu palette (try it
and you'll see what I mean).
Lining Up The Scans
- Select the first of the two halves and fit the image onscreen by
double-clicking the Hand tool in the toolbox.
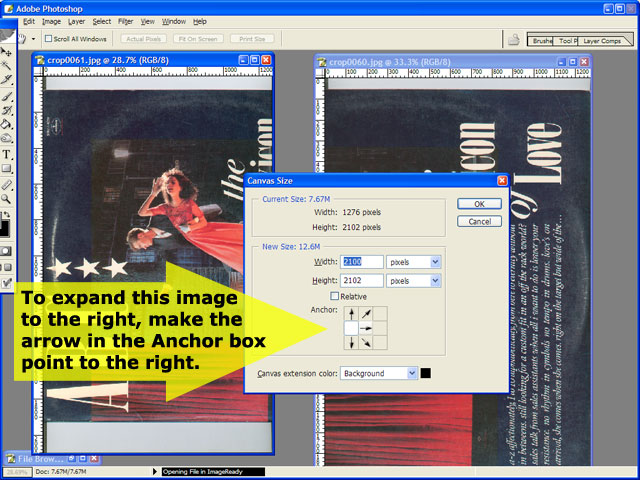
- Go to Image - Canvas Size.
- In the New Size part of the Canvas Size dialog, set both Width and
Height to the larger of the two values, and set the arrows on the
Anchor control so that they point in the direction you want the canvas
to grow to make room for the rest of the sleeve. For the Canvas
Extension Color, pick black. Then click OK.
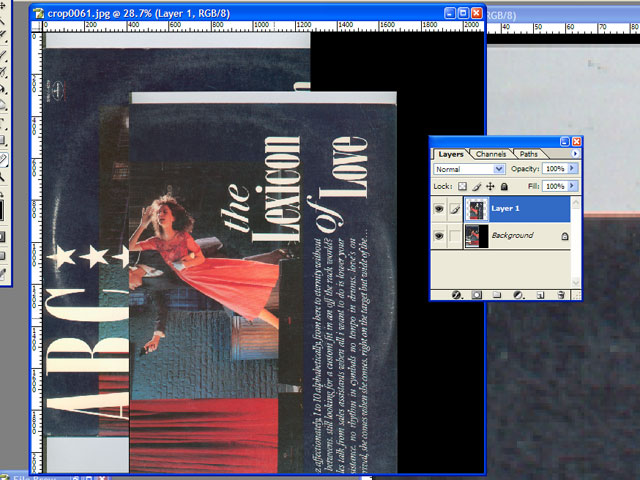
- Select the second half of the image, and drag its layer from the
Layers palette into the image containing the first half. This will
create a new layer in that image.
- You should now have an image that contains both halves of the
image, each in its own layer. With this image selected, double-click
the Hand tool to fit the image onscreen.
- Select the top layer in the Layers palette and click Add Layer
Mask (the circle-in-a-square at the bottom of the palette).
- With the top layer still selected, change its Blending mode to
"Difference" in the dropdown at the top of the layers palette.
- You can now see through the top layer down to the layer
underneath. Wherever the colors in the top layer match the colors in
the bottom layer, the image will be dark.
- Click inside the image (to remove focus from the Blending mode
dropdown) and press V to select the Move tool.
- Drag the top layer so it overlaps the bottom layer as closely as
possible. Your goal is to make the overlapping portion as dark as
possible.
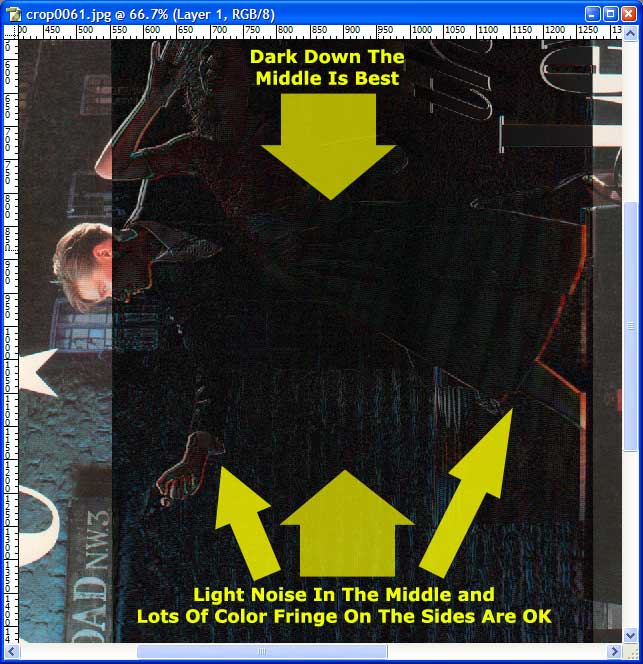
- Double-click the Zoom tool in the toolbox to set zoom at 100%.
You'll probably see some color fringe around lines in the image. Use
the arrow keys to move the top layer again until there's as little
color fringe as possible. You probably won't be able to remove all
the color fringe from the dark area, especially towards the edges of
the scans where the sleeve is cropped. Ideally you want the darkest
area to run down the middle of the portion that overlaps.
The two layers are now aligned. There shouldn't be more than a pixel
or two of color fringe down the center of the dark area -- if there is,
the two halves are probably slightly out of alignment with each other
and you may want to start over with the original scans. It can take a
little practice to get the alignment down but you'll get the hang of it
quickly.
Merging The Halves
- Double-click the Hand tool again to fit the entire image onscreen.
The middle third of the sleeve will be a mostly-black area, with the
thirds on either side looking normal.
- Press Shift-B to select the Brush tool in the toolbox. Set the
brush's hardness to 0% and its size to 300 pixels or so (there's a
preset for this in the Brush: dropdown.
- Set the foreground color to black.
- In the Layers palette, click on the layer mask of the top layer --
the white square to the left of the layer's thumbnail.
- Using the brush tool, draw a line down the center of the black
area. By painting black in the layer mask of the top layer, you're
telling Photoshop not to display that portion of the layer, and the
bottom layer will show through.
- Use the brush tool to remove all of the rest of the black area on
the normally-colored side of the image.
- Set the top layer's Blending mode back to Normal. You should now
see the complete sleeve, in normal colors.
- Examine the image to make sure you can't tell where the layers
merge.
- If you can't spot any obvious misalignment at 100% zoom, you're
done. Select Layer - Flatten Image and save the sleeve image.
You can now finish cleaning up, cropping, and resizing the image for upload.
Last modified: Thu Oct 26 22:53:13 Pacific Daylight Time 2006